I recently read the book 'How (not) to paint a locomotive' by Christopher Vine (ISBN: 9780955335907). It's full of useful information, and a council of perfection. I read a lot of the things I'd tried when painting the A3, and although I stopped short of what he'd done, I came to many of the same conclusions.

I sprayed using a Pasche internal mixing air brush, using automotive type paints (NOT two-pack cyano acrylics, which absolutely need an external air fed mask. I used water based paints (sounds odd, but I'm told are the replacement for cellulose paints) , thinned with cellulose thinners.
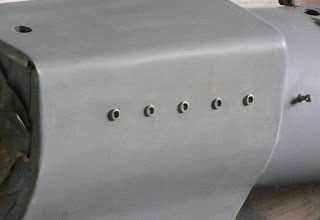
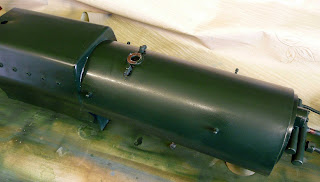
I started a very light coat of etch primer, just a token rub down, then grey primer. Finally, a few light coats of gloss.
Once its cured - at least a week - I flatted down the surface with 1200 grit wet and dry paper. I then used cutting paste in two grades, and was amazed at the quality of finish I achieved.
I've heard aerosol spray paints being recommended. I have tried them, and been totally disappointed with the results - so much so that I stripped it all off and started again. One of the problems was that the later coats would attack the earlier coats especially in areas that had been well sanded. Now, if you really wanted to create a crackle finish, that would be the way to go.
Its surprising how long it takes, and how little there is to show for the work. Also, there's very little worth photographing. I tried photos of the surface texture as work progressed, but they didn't show anything useful.
I left the completed painting for a couple of weeks to harden before doing the lining. Longer might have been better, but I had no problems. If the paint's well hardened, its easy to wipe off any lining errors and try again.
For lining, I use a draughtsman's ruling pen and Humbrol enamel. I take a few drops of the paint onto the lid of another tin, and add a drop (only) of Ronson lighter fluid - this totally changes the viscosity of the paint, but doesn't significantly dilute it. I made up templates for the cab lining, holding them off the paintwork with bluetak to prevent capillary action from spoiling the lining.
For lining that runs parallel with an edge, I use a set of bow-spring ink compasses, with the point set a long way out to act as a guide. With a little practice, and the knowledge that errors are easily removed, its quite easy. As soon as the paint stops flowing, I clean the pen and re-fill. Occasionally, I get a slight blob of extra paint where I start or stop - If they're only little, I tend to leave them, and trim away the excess with a modeling knife (scalpel !) once the paint's dry.
As you see, I've painted and lined all the loco, but still have the tender to complete building. Not very clever -it's much more efficient to paint it all at once, but I just wanted the loco complete and out of my workshop.


I sprayed using a Pasche internal mixing air brush, using automotive type paints (NOT two-pack cyano acrylics, which absolutely need an external air fed mask. I used water based paints (sounds odd, but I'm told are the replacement for cellulose paints) , thinned with cellulose thinners.
I started a very light coat of etch primer, just a token rub down, then grey primer. Finally, a few light coats of gloss.
Once its cured - at least a week - I flatted down the surface with 1200 grit wet and dry paper. I then used cutting paste in two grades, and was amazed at the quality of finish I achieved.
I've heard aerosol spray paints being recommended. I have tried them, and been totally disappointed with the results - so much so that I stripped it all off and started again. One of the problems was that the later coats would attack the earlier coats especially in areas that had been well sanded. Now, if you really wanted to create a crackle finish, that would be the way to go.
Its surprising how long it takes, and how little there is to show for the work. Also, there's very little worth photographing. I tried photos of the surface texture as work progressed, but they didn't show anything useful.
I left the completed painting for a couple of weeks to harden before doing the lining. Longer might have been better, but I had no problems. If the paint's well hardened, its easy to wipe off any lining errors and try again.
For lining, I use a draughtsman's ruling pen and Humbrol enamel. I take a few drops of the paint onto the lid of another tin, and add a drop (only) of Ronson lighter fluid - this totally changes the viscosity of the paint, but doesn't significantly dilute it. I made up templates for the cab lining, holding them off the paintwork with bluetak to prevent capillary action from spoiling the lining.
For lining that runs parallel with an edge, I use a set of bow-spring ink compasses, with the point set a long way out to act as a guide. With a little practice, and the knowledge that errors are easily removed, its quite easy. As soon as the paint stops flowing, I clean the pen and re-fill. Occasionally, I get a slight blob of extra paint where I start or stop - If they're only little, I tend to leave them, and trim away the excess with a modeling knife (scalpel !) once the paint's dry.
As you see, I've painted and lined all the loco, but still have the tender to complete building. Not very clever -it's much more efficient to paint it all at once, but I just wanted the loco complete and out of my workshop.
Comments